
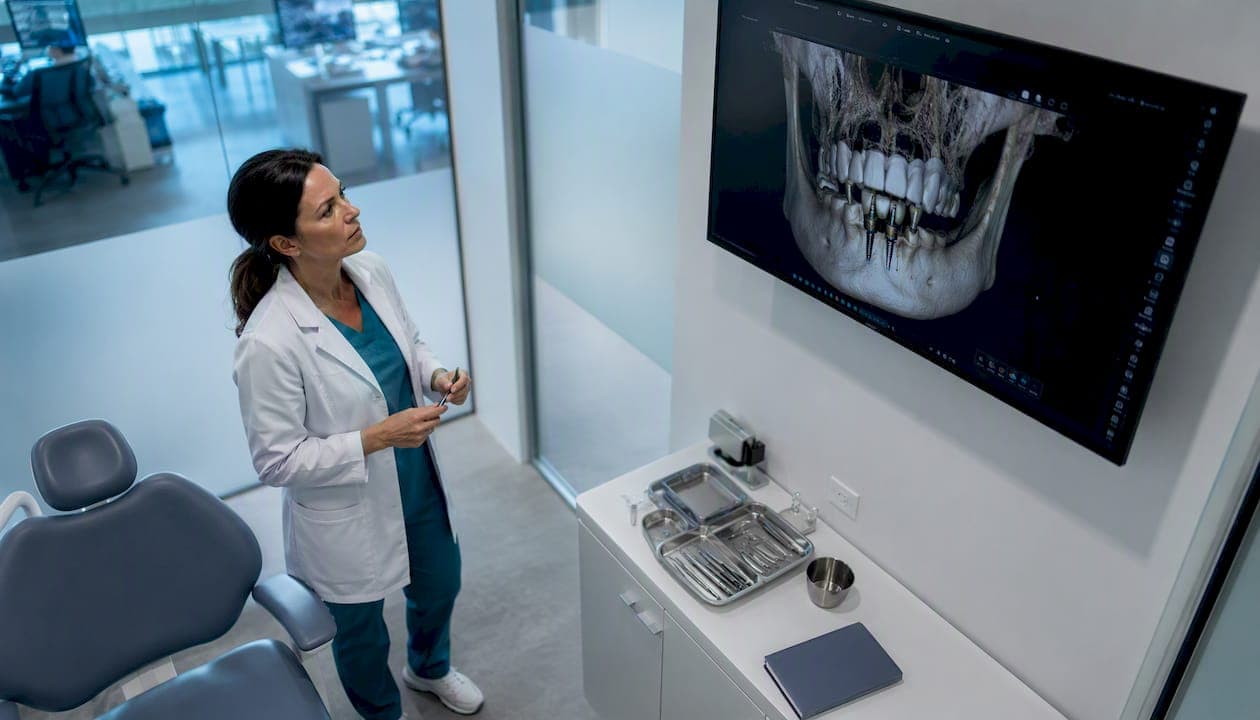
A digital implant workflow is an end-to-end, prosthetically driven process that uses CBCT imaging, intraoral scanning, virtual planning software, and CAD/CAM fabrication to plan, place, and restore dental implants with greater precision than traditional freehand techniques. The final tooth position drives every decision, from implant angle to bone reduction, before a single incision is made. For patients, that means fewer appointments and a more predictable result. For clinicians, it means surgical complications identified on a screen rather than discovered at the chair.
At Forever Smiles Implant Center in Jacksonville, Florida, this workflow is not a feature added to a general practice. It is the operating system the entire practice runs on, applied to full-arch reconstruction cases every day.
Table of Contents
- How a digital implant workflow moves from scan to final restoration
- What technologies actually power the digital implant process
- Static surgical guides vs. dynamic navigation: how to choose
- How digital workflows make same-day teeth predictable
- The evidence: what clinical studies say about accuracy and outcomes
- Limitations and common error sources you need to know
- Which cases are ideal for a digital workflow and which need caution
- Typical timelines and visit counts: single implant vs. full-arch
- Checklist for clinicians adopting a digital implant workflow
- How Forever Smiles Implant Center runs a full-arch digital workflow
- Key Takeaways
- What 20 years of placing implants taught me about digital workflows
- Useful sources and further reading
How a digital implant workflow moves from scan to final restoration
The digital implant process replaces physical impressions, wax-ups, and manually fabricated surgical guides with a coordinated chain of digital steps. Each stage feeds the next, and errors introduced early propagate forward, which is why sequence and verification matter as much as the technology itself.
-
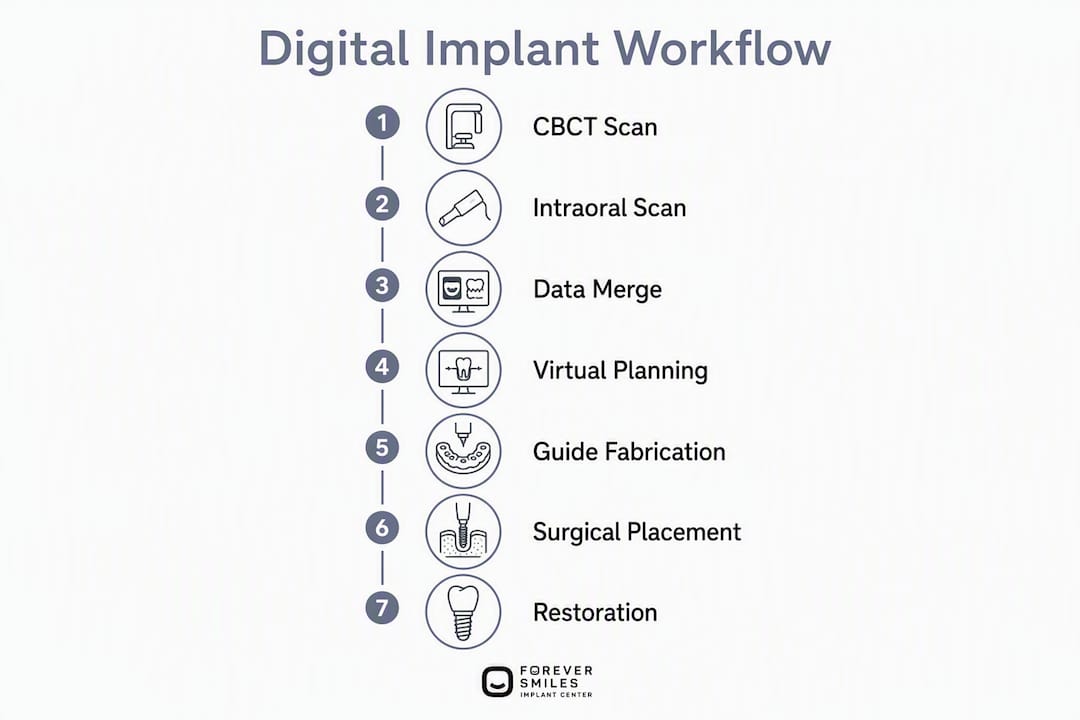
Patient evaluation and CBCT imaging. A cone-beam CT scan captures bone volume, density, nerve positions, and sinus anatomy in three dimensions. This replaces the flat periapical and panoramic films that guided freehand surgery for decades.
-
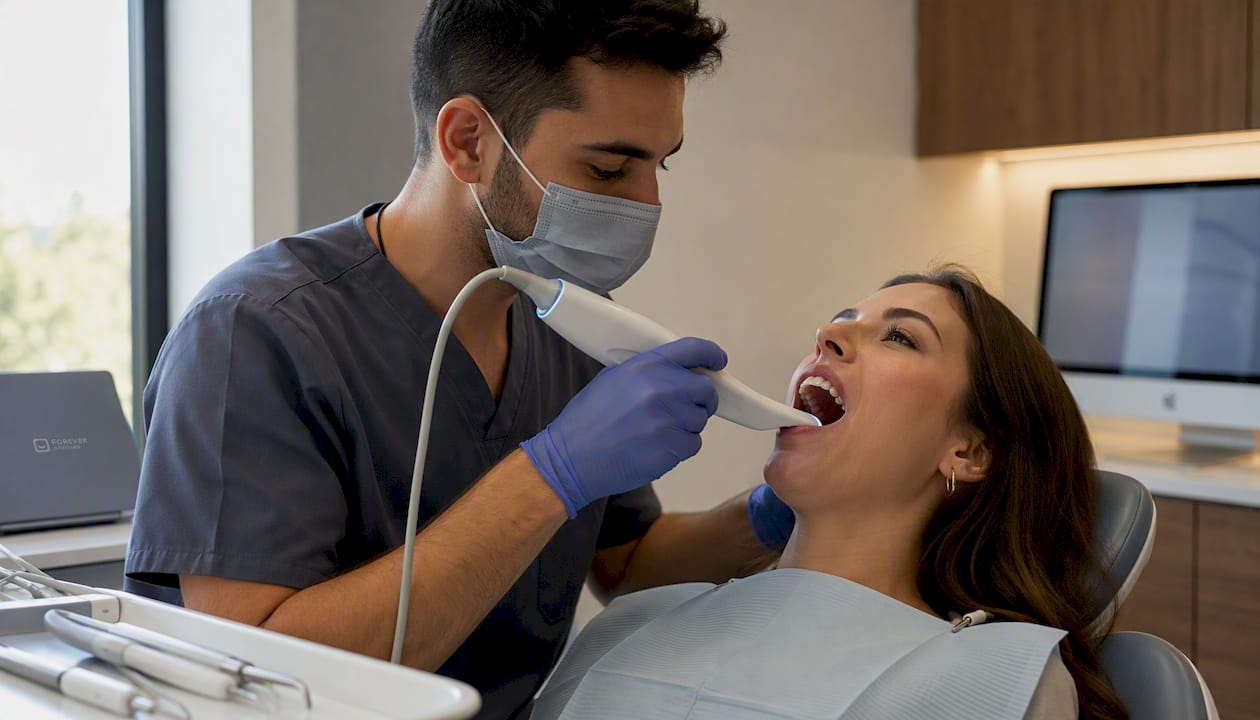
Intraoral scanning. A wand-style scanner captures the soft tissue, remaining teeth, and occlusal surfaces as a digital mesh (.stl or .ply file). This replaces alginate and PVS impressions. Patients consistently report this step as more comfortable than traditional putty impressions, and the digital file transfers instantly to planning software.
-
Data merge and registration. The CBCT dataset (DICOM format) and the intraoral scan are aligned in planning software using fixed anatomical landmarks. This is the most error-prone step in the entire chain. A misaligned merge produces a surgical guide that places implants in the wrong position, regardless of how accurate the individual scans were.
-
Prosthetically driven virtual planning. The surgeon and restorative team design the final tooth position first, then work backward to determine optimal implant placement. Bone alone does not dictate the plan. As Decisions in Dentistry notes, prosthodontists stress that the final tooth position should dictate implant placement, not available bone alone.
-
Surgical guide or navigation setup. The plan is exported to either a static CAD/CAM surgical guide (3D-printed or milled) or a dynamic navigation system. This decision depends on case complexity, available equipment, and the surgeon's preference for intraoperative flexibility.
-
Guided implant placement. The surgeon places implants through the guide or with real-time navigation feedback. Primary stability is measured, and the decision to load immediately or defer is made at this stage.
-
Scan body capture and digital impression. Scan bodies attach to the implant fixtures and are captured by intraoral scanner, replacing conventional implant-level impressions. The resulting file goes directly to the lab or in-house milling unit.
-
CAD/CAM prosthesis design and production. A dental technician or in-house lab designs the prosthesis digitally and mills or prints it from zirconia, PMMA, or other materials. For same-day cases, a provisional is printed or milled chairside.
-
Delivery and verification. The prosthesis is seated, occlusion is verified, and a postoperative CBCT or periapical confirms implant position against the planned position. Any deviation is documented.
What technologies actually power the digital implant process
Understanding the tools helps clinicians evaluate vendor ecosystems and helps patients ask better questions at consultation.
CBCT scanners produce DICOM files that planning software reads to render a 3D bone model. Resolution settings matter: higher resolution captures finer trabecular detail but increases radiation dose. Most planning workflows use a medium-resolution protocol that balances diagnostic quality with dose.
Intraoral scanners from manufacturers like Dentsply Sirona capture full-arch scans in minutes. Dentsply Sirona's Primescan, for example, integrates with the company's planning and restorative ecosystem, allowing scan data to flow directly into prosthetic design without manual file conversion. The scan file format (.stl or .ply) is the bridge between the clinic and the lab.
Planning software merges CBCT and scan data, renders the virtual patient, and allows the team to simulate implant placement, check clearances, and design the surgical guide. Most platforms export guide files directly to 3D printers.
3D printers and CAD/CAM mills produce surgical guides, provisional prostheses, and in some workflows, final restorations. SprintRay's Pro series printers are widely used in implant practices for same-day provisional fabrication. The ability to print a provisional in-house on surgery day is what makes true same-day workflows operationally feasible.
Scan bodies and lab communication protocols close the loop between placement and restoration. Scan bodies are implant-specific components that the intraoral scanner reads to capture implant position and angulation. File transfer to the lab typically happens via secure cloud links or direct export, with the .xgx format used in some ecosystems for full-case data packages.
Pro Tip: Before committing to a planning software platform, confirm that it accepts DICOM from your specific CBCT unit and exports guide files compatible with your printer or milling service. Closed ecosystems can lock you into a single vendor chain.
Vendor-reported figures from clinic audits suggest that moving to a fully digital workflow can reduce case turnaround time by up to 72% and decrease remake rates from around 15% to approximately 3%. These figures come from vendor and clinic reports rather than controlled clinical trials and should be interpreted accordingly.
Static surgical guides vs. dynamic navigation: how to choose
Both methods improve on freehand placement, but they solve different problems. The choice depends on case complexity, available equipment, and how much intraoperative flexibility the surgeon needs.
| Dimension | Static CAD/CAM surgical guide | Dynamic navigation |
|---|---|---|
| What it replaces | Freehand placement or analog stent | Freehand placement with real-time feedback |
| Clinical benefit | Repeatable, prosthetically driven positioning | Real-time adjustments during surgery |
| Visits/time impact | Guide fabricated pre-op; surgery day is efficient | No guide fabrication; setup time on surgery day |
| Equipment investment | 3D printer or milling access; planning software | Navigation unit (a substantial equipment investment); training |
| Ideal indications | Straightforward prosthetic-driven cases, immediate provisionals, high-volume practices | Limited access, anatomy that complicates guide seating, cases needing intraop flexibility |
Static guides are the workhorse of high-volume implant practices. Once the plan is verified and the guide is printed, surgery day becomes highly predictable. The guide physically constrains the drill path, so the surgeon does not need to mentally translate a 3D plan into freehand movements. The limitation is that the guide is only as accurate as the data merge and the fit at seating. A guide that rocks or lifts even slightly introduces positional error.
Dynamic navigation gives the surgeon a live GPS-style overlay showing implant position relative to the plan in real time. This is valuable when guide seating is anatomically difficult, when a case changes intraoperatively, or when the surgeon is working in a narrow posterior corridor. The tradeoff is a steeper learning curve and a significantly higher equipment investment.
Key considerations when choosing:
- Static guides suit practices doing high volumes of straightforward single-tooth and full-arch cases with a reliable in-house or same-day lab.
- Dynamic navigation suits surgeons handling complex anatomy, revision cases, or situations where guide seating cannot be reliably confirmed.
- Both methods require the same rigorous data merge verification. Navigation does not eliminate the need for accurate pre-op data.
- For immediate provisional workflows, static stackable guides allow the restorative team to seat a pre-fabricated provisional immediately after placement, which is harder to coordinate with navigation-only systems.
How digital workflows make same-day teeth predictable
Same-day implants are not a marketing promise. They are a clinical protocol with specific prerequisites, and digital tools are what make those prerequisites achievable reliably.
The minimum requirements for immediate loading are primary stability (typically 35 Ncm or greater insertion torque), a prosthetic plan that is complete before surgery begins, and the ability to deliver a provisional that does not transmit harmful lateral forces to the implants during healing.
A practical same-day full-arch protocol looks like this: pre-op CBCT and intraoral scan are merged and verified, the prosthetic plan is finalized, a stackable guide system is fabricated (bone reduction guide, implant placement guide, provisional seating guide), and the provisional prosthesis is printed or milled before the patient arrives. On surgery day, the team works through the guide sequence, places implants, verifies stability, and seats the provisional. The patient leaves with fixed teeth.
Stepwise frameworks for immediate implant placement and loading that merge CBCT segmentation, intraoral scans, and stackable-guide systems have been described in the literature as a method for achieving predictable full-arch results. The key is that the provisional is designed around the final tooth position, not improvised at the chair.
Indications for immediate loading:
- Adequate bone volume and density for primary stability
- No active infection at the surgical site
- Patient able to follow a soft-diet protocol during osseointegration
- Prosthetic plan fully designed and verified pre-operatively
Contraindications and red flags:
- Uncontrolled systemic conditions (unmanaged diabetes, active immunosuppression)
- Active oral infection or significant residual pathology
- Insufficient primary stability at placement
- Patient unable or unwilling to comply with healing-phase restrictions
- Anatomy that prevents accurate guide seating or verification
When any of these red flags appear, the plan shifts to a delayed-loading protocol. The digital workflow still applies; the timeline simply extends.
The evidence: what clinical studies say about accuracy and outcomes
Guided surgery shows comparable implant survival to conventional freehand techniques while improving prosthetically driven positioning, healing time, and immediate postoperative comfort, according to clinical case and review literature. The advantage is not survival rate alone. It is the reduction in positional deviation that matters most for prosthetic fit and long-term biomechanics.
Digital planning allows the team to perform virtual "mock surgery" before the patient is in the chair. Anatomical risks, including proximity to the inferior alveolar nerve, sinus floor, and adjacent roots, are identified and addressed in the planning phase rather than discovered during surgery. That shift from reactive to proactive is the primary clinical value of the digital workflow.
"The primary clinical value of the digital workflow is predictability: virtual 'mock surgery' identifies anatomical risks before incision, reducing surgical complications." — Decisions in Dentistry
Intraoral scanning also changes the patient experience in ways that affect case acceptance. Eliminating putty impressions removes one of the most commonly cited sources of patient discomfort, and the ability to show patients a 3D visualization of their planned result during consultation helps them understand and commit to treatment.
From a practice efficiency standpoint, vendor and clinic reports cite remake rates dropping from about 15% to roughly 3% when moving to fully digital processes. These figures are from clinic-level audits rather than randomized controlled trials, but the directional trend aligns with what clinicians report in practice: fewer remakes, fewer adjustment appointments, and more predictable prosthetic fit.
Limitations and common error sources you need to know
Digital does not mean automatic. The most common failures in digital implant workflows trace back to human decisions, not software bugs.
Common error sources:
- CBCT-to-scan registration errors. If the data merge is off by even a millimeter, the surgical guide places implants in the wrong position. This error is invisible until the guide is seated or, worse, until the prosthesis does not fit.
- Poor guide seating. A guide that does not seat fully and stably transfers the positional error of its misfit directly to the drill path. Guides must be tested on a printed model before surgery day.
- Inaccurate scan bodies. Using the wrong scan body for the implant system, or seating it incompletely, produces an incorrect implant position in the digital impression. The prosthesis will not fit.
- Complacency. Assuming that because the plan is digital, the execution is automatically accurate. Every step requires human verification.
Risk mitigation steps:
- Manually verify every data merge against at least three fixed anatomical landmarks before exporting the guide file.
- Test-seat every surgical guide on a printed model of the patient's arch before surgery.
- Confirm guide stability intraoperatively before beginning the first osteotomy.
- Use intraoperative verification imaging (periapical or CBCT) to confirm implant position before seating a same-day provisional.
- Document every verification step in the patient record.
- Build a consent checklist that explains the limits of guided surgery to patients in plain language.
Merging CBCT and intraoral scan datasets is critical and error-prone; manual verification against anatomical landmarks is necessary before transferring any plan to surgery. This is not optional. It is the single most important quality control step in the entire workflow.
Which cases are ideal for a digital workflow and which need caution
Not every patient is a straightforward candidate for a fully digital protocol, and recognizing the difference early saves time, money, and clinical risk.
Strong candidates share these characteristics:
- Sufficient bone volume for implant placement, or a clear augmentation plan integrated into the digital workflow
- Favorable occlusal scheme that supports prosthetic-driven planning
- Ability to achieve primary stability at the planned positions
- Realistic expectations about same-day aesthetics and the healing timeline
- No active systemic conditions that compromise healing
Cases requiring caution or specialist referral:
- Uncontrolled systemic disease (diabetes, autoimmune conditions, active bisphosphonate therapy)
- Active oral infection or significant untreated periodontal disease
- Severely limited mouth opening that prevents accurate guide seating
- Anatomy that makes CBCT-to-scan registration unreliable (extensive metallic restorations, severe arch deformity)
- Unrealistic expectations about immediate aesthetics
For patients with severe bone loss, previously failed implants, or anatomy that requires zygomatic implants, the digital workflow still applies, but the complexity demands a specialist. General practitioners who encounter these cases should refer rather than attempt to adapt a standard protocol. The dental implant candidacy checklist at Forever Smiles Implant Center covers the full range of complex-case criteria in detail.
Patients who have been told they are not candidates elsewhere often arrive at specialist centers with exactly this profile. Advanced digital planning, combined with surgical expertise in zygomatic and pterygoid implants, frequently opens options that a standard workflow would miss.
Typical timelines and visit counts: single implant vs. full-arch
The visit reduction is one of the most tangible benefits patients experience. Here is how the numbers compare across two common protocols.
| Stage | Single-tooth digital workflow | Full-arch digital workflow |
|---|---|---|
| Consultation and imaging | 1 visit (CBCT + intraoral scan) | 1 visit (CBCT + intraoral scan + records) |
| Planning and guide/prosthesis fabrication | 1–2 weeks (lab or in-house) | 1–2 weeks (stackable guides + provisional) |
| Guided placement | 1 surgical visit | 1 surgical visit (same-day provisional seated) |
| Healing phase | a typical osseointegration healing phase | |
| a typical osseointegration healing phase | ||
| Final restoration | 1–2 visits (scan body, delivery) | 1–2 visits (final zirconia design, delivery) |
| Total visits | 3–4 | 4–5 |
Traditional analog workflows for the same cases typically require 6–10 visits, with additional appointments for impression retakes, try-ins, and adjustments. The digital reduction comes from front-loading the work into the planning phase rather than resolving problems at the chair.
Lab and manufacturing turnaround for a 3D-printed surgical guide runs roughly 3–5 business days from an outside lab, or same-day when an in-house printer is available. Final zirconia prostheses typically require 2–4 weeks from the final scan body capture. For patients who want to understand what to expect at each stage, the Forever Smiles Implant Center what-to-expect page walks through the full timeline in patient-friendly language.
Checklist for clinicians adopting a digital implant workflow
Before running a first guided case, a practice needs more than equipment. It needs a verified process.
Equipment and software essentials:
- CBCT unit with DICOM export compatible with your planning software
- Intraoral scanner with .stl/.ply export capability
- Implant planning software that accepts both DICOM and intraoral scan files
- 3D printer or access to a same-day printing service (SprintRay Pro or equivalent)
- Scan bodies for every implant system used in the practice
- Secure file transfer protocol for lab communication
Staff training and role assignments:
- Designate one team member as the scanning lead; consistency in scanning technique reduces data quality variability
- Assign data merge verification to the surgeon or a trained clinical coordinator, not a front-desk team member
- Train the lab technician or in-house lab on guide design parameters and tolerance requirements
- Brief the surgical assistant on guide seating verification and intraoperative documentation
Verification and QA steps:
- Run at least two test cases with postoperative CBCT verification before adopting same-day loading protocols
- Build a merge verification checklist with at least three landmark checkpoints
- Test-seat every guide on a printed model before surgery day
- Document planned vs. actual implant position for every guided case
- Review deviation data quarterly to identify systematic errors
Pro Tip: Run your first fully digital case as a delayed-loading protocol. This lets you verify the accuracy of your data merge and guide fabrication against a postoperative CBCT without the pressure of a same-day provisional commitment.
A practical five-step clinician workflow covering intraoral scan, CBCT, data merge, lab collaboration, and guided placement has been documented in clinical literature as a reliable starting framework for practices building their first digital protocol.
How Forever Smiles Implant Center runs a full-arch digital workflow
At Forever Smiles Implant Center, every full-arch case follows a structured digital protocol from the first appointment through final zirconia delivery. The workflow is not adapted from a general dentistry model. It was built around full-arch reconstruction from the start.
Intake and imaging. The patient's first clinical appointment includes a full CBCT scan and intraoral scan. The imaging team captures bone volume, nerve anatomy, and sinus positions. The intraoral scan records the existing occlusion, soft tissue contours, and any remaining teeth. Both datasets are merged and verified against anatomical landmarks before any planning begins.
Virtual prosthetic design. Dr. Brian Young and the restorative team design the final tooth position first. Implant positions are then planned to support that prosthetic outcome. For complex cases, including patients with severe bone loss or previously failed implants, this planning phase may include evaluation for zygomatic or pterygoid implant positions that a standard workflow would not consider.
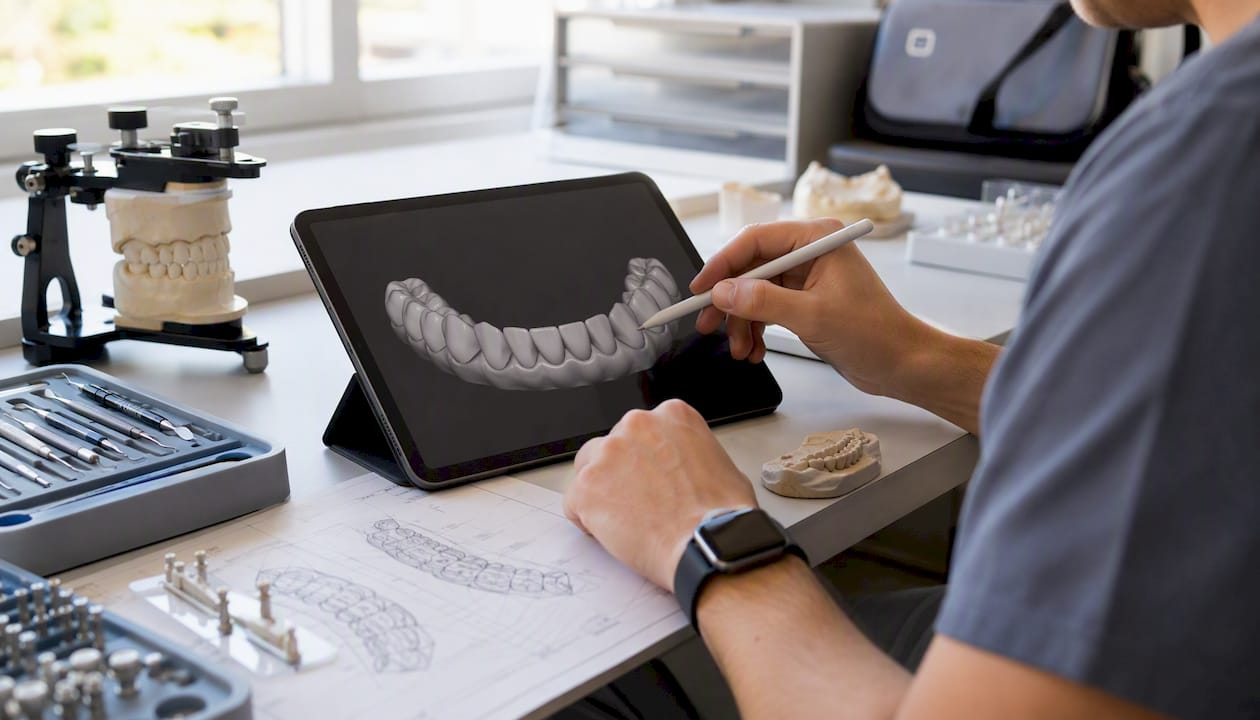
Guide and provisional fabrication. For same-day cases, a stackable guide system is fabricated: a bone reduction guide, an implant placement guide, and a provisional seating guide. The provisional prosthesis is designed and printed before surgery day. The patient arrives knowing that fixed teeth are the plan for that day, not a possibility.
Surgery and same-day delivery. The in-house MD anesthesiologist manages sedation for complex cases, which allows the surgical team to focus entirely on execution. Guides are seated and verified before the first osteotomy. Primary stability is confirmed at each implant before the provisional is loaded.
In-house lab finishing and final restoration. The in-house lab handles provisional adjustments, final zirconia design, and delivery. Having the lab on-site compresses turnaround time and allows direct communication between the surgeon and the technician when fit issues arise. Final restorations are verified against the original digital plan.
Outcome metrics tracked at Forever Smiles Implant Center include prosthetic fit at delivery, remake rate, and patient-reported satisfaction. Patients converting from dentures to fixed implants can review the full-mouth implant process in detail before their consultation.
Vendor and clinic audit data suggest that practices with in-house lab capability and same-day printing can reduce case turnaround time by up to 72% compared to workflows dependent on outside lab fabrication, with remake rates dropping from around 15% to approximately 3% in fully digital processes.
Key Takeaways
A digital implant workflow is the most predictable method available for planning and placing implants, but its accuracy depends entirely on data quality and human verification at every stage.
| Point | Details |
|---|---|
| Definition | A digital implant workflow replaces analog impressions and manual guides with CBCT, intraoral scanning, and CAD/CAM fabrication. |
| Prosthetically driven planning | Final tooth position must dictate implant placement; bone availability alone should never drive the plan. |
| Same-day feasibility | Immediate loading requires primary stability, a complete pre-op prosthetic plan, and in-house or same-day printing capability. |
| Biggest limitation | Data merge errors between CBCT and intraoral scan are the most common source of guide inaccuracy; manual verification is non-negotiable. |
| Complex cases need specialists | Severe bone loss, previously failed implants, and zygomatic cases require specialist-level digital planning, not a standard protocol. |
What 20 years of placing implants taught me about digital workflows
The technology is genuinely better. That is not a vendor claim. Guided surgery gives you a level of prosthetic predictability that freehand placement simply cannot match consistently, especially in full-arch cases where every implant position affects the fit of the final prosthesis. The planning phase now does work that used to happen at the chair, and that shift changes everything about how surgery day feels.
What most articles about digital workflows understate is where the failures actually happen. They do not happen because the software is wrong. They happen because someone skipped the data merge verification, or the guide rocked slightly at seating and nobody caught it, or the team assumed that digital meant automatic. The technology raises the ceiling on what is achievable, but it does not lower the floor on what can go wrong when the process is not followed.
The other thing worth saying plainly: a digital workflow in the hands of a clinician without deep surgical experience is not safer than freehand in the hands of a skilled surgeon. The guide constrains the drill path, but it does not make decisions about bone quality, primary stability, or when to abort a same-day plan. Those judgments still require experience. The workflow is a tool. The surgeon is still the variable that matters most.
For patients, the practical takeaway is this: ask whether your provider runs a fully digital workflow, and then ask who verifies the data merge and who designed the prosthetic plan. The answers tell you more about the quality of care than any equipment list.
Useful sources and further reading
The literature on digital implant workflows spans peer-reviewed systematic reviews, clinical case series, and vendor-developed protocol frameworks. These are the sources worth consulting for in-depth protocols and evidence.
- Digital Workflow for Implant Placement and Immediate Loading — PMC: A peer-reviewed PMC article covering immediate loading protocols and digital workflow integration; useful for clinicians building same-day full-arch protocols.
- Digital Workflow for Implant Prostheses — Decisions in Dentistry: The most clinician-accessible review of prosthetically driven planning principles, data merge requirements, and workflow stages. Start here.
- A 10-Step Digital Workflow for Immediate Implant Placement and Loading: A stepwise protocol paper covering CBCT segmentation, intraoral scan integration, and stackable-guide systems for full-arch immediate loading. Detailed and practical.
- Scan, Plan, Place & Restore — DDS News: A practical everyday workflow framework for clinicians; covers the five core steps and software/hardware touchpoints in plain language.
- PubMed — Implantology literature database: The primary database for peer-reviewed implant surgery research. Search guided surgery, digital workflow, and immediate loading for systematic reviews and RCTs.
- The 6-Step Total Fit Workflow — 3Shape Blog: A vendor-developed framework describing restorative digital patient modeling, guide design, and delivery; useful for understanding how commercial ecosystems structure the workflow.
- Lance Timmerman, DMD — South Seattle Smiles: A clinical partner practice; relevant for clinicians exploring referral networks and collaborative digital workflow protocols across practices.
For patients ready to discuss whether a digital full-arch workflow is right for their case, the Forever Smiles Implant Center FAQ page covers common questions about the process, timeline, and what to expect from consultation through final delivery.
If you are in Jacksonville or Northeast Florida and want a full-arch evaluation with a specialist who runs this workflow daily, full-mouth implant options at Forever Smiles Implant Center are a logical next step.