
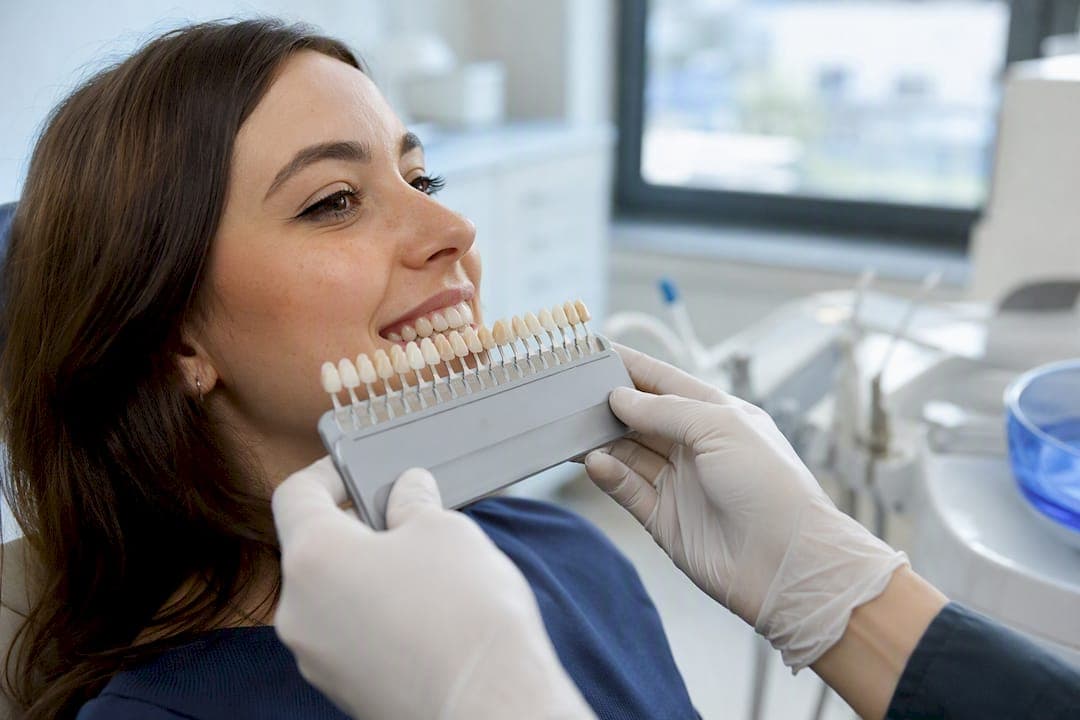
The most reliable way to answer "what is tooth shade selection implants" is this: it's the clinical process of matching an implant crown's color to your natural teeth using both a visual shade guide and an instrumental color reading, then documenting that data precisely enough for a lab to reproduce it. The dominant, evidence-backed method combines the VITA classical shade guide for a value-first visual check with a spectrophotometer like VITA Easyshade for an objective number, then sends both to the lab as a photographed, mapped record. Studies define a color difference around the threshold at which most people begin to notice a mismatch, which is the practical bar your final crown needs to clear.
Implant cases carry three extra risks a natural tooth restoration does not:
- Abutment color bleed-through — the metal or ceramic post under the crown can shift the final hue, especially through thin tissue.
- Thin gingival biotype — delicate gum tissue shows underlying color changes more readily, which affects how the whole restoration reads.
- Material translucency — the crown material itself (zirconia, lithium disilicate, PFM) scatters or transmits light differently than your remaining natural teeth.
Key Takeaways
Natural-looking implant crowns depend on combining value-first visual shade matching with an instrumental spectrophotometer reading, documented precisely enough for the lab to reproduce it.
| Point | Details |
|---|---|
| Use a dual-approach | Combine a VITA shade guide visual check with a spectrophotometer reading like VITA Easyshade for accuracy. |
| Select value before hue | Match value first, then chroma, then hue, since the eye detects lightness differences most readily. |
| Watch the ΔE 3.7 threshold | Color differences above roughly ΔE 3.7 become visually noticeable to most people. |
| Confirm abutment material | Gray titanium can cast a grayish tone through thin gum tissue; zirconia or gold-hue abutments often mask it better. |
| Time it around whitening and healing | Finish whitening 2 to 4 weeks before shade selection and wait for tissue to stabilize before finalizing color. |
| Choose a specialist workflow | Forever Smiles Implant Center pairs digital shade documentation with an in-house lab to shorten feedback loops on complex cases. |
Table of Contents
- What Is Tooth Shade Selection for Implants, Exactly?
- Why Do Implant Crowns Match Color Differently Than Natural Teeth?
- How Do Dentists Choose and Transfer the Right Shade?
- Which Tools and Materials Actually Affect the Final Color?
- What Mistakes Lead to a Mismatched Crown?
- When Should Shade Selection Happen in the Implant Timeline?
- Does Abutment Material Really Change the Final Tooth Color?
- What Should You Ask at Your Shade Appointment?
- Why Standardized Shade Protocols Matter More Than People Assume
- Get a Precision Shade Match for Your Implant Case
- Frequently Asked Questions
- Sources
What Is Tooth Shade Selection for Implants, Exactly?
Shade selection is built on three variables: hue, chroma, and value. Hue is the actual color family, the yellow, red-yellow, or gray-yellow cast a tooth carries. Chroma is the saturation, or how intense that color is. Value is the lightness or darkness on a black-to-white scale, and it's the one that matters most.
Prosthodontic guidance recommends selecting in a specific order: value first, chroma second, hue last, because the human eye is far more sensitive to differences in lightness than to differences in color family, according to the American College of Prosthodontists. Get the value wrong and a crown looks fake even if the hue is close. Get the value right and small hue mismatches barely register.
Two shade guide families dominate clinical practice:
- VITA Classical — the older, widely used 16-tab system organized by hue groups (A, B, C, D), still the standard starting point in most practices.
- VITA Toothguide 3D-Master — organized by value first, which aligns better with the value-chroma-hue selection order but requires more training to use well.
Most clinicians prioritize the middle third of the tooth when picking a shade, since it best represents overall hue and chroma. Matching off the incisal edge, which is naturally more translucent and grayish, is a common way to end up with a crown that looks too dark or too opaque.
Why Do Implant Crowns Match Color Differently Than Natural Teeth?
A natural tooth has layered dentin and enamel that scatter light in a specific, organic way. An implant crown sits on an abutment with no biological tissue underneath, and that changes the optics entirely. Several factors compound the challenge:
- Abutment or "stump shade" bleed-through, particularly with gray titanium abutments under thinner ceramic crowns.
- No natural dentin-enamel layering, so the lab has to simulate depth and translucency artificially.
- Peri-implant soft tissue color and thickness, which can look different from the gum around a natural tooth root.
- Metamerism, where a crown that matches perfectly under office lighting looks off under sunlight or fluorescent light at home.
ΔE and why it matters: Clinical spectrophotometric research uses a ΔE value of roughly 3.7 as the threshold most people can visually detect as a mismatch, according to a clinical trial on implant-supported restoration esthetics. Stay under that number and the crown reads as natural. Go over it and patients tend to notice, even if they can't articulate exactly what's wrong.
A color-matched crown that ignores translucency, surface texture, and incisal characterization still looks artificial. Color is only one part of what your eye reads as "natural." A flat, glossy, single-shade crown can hit the right ΔE number and still look like a denture tooth sitting in your mouth.
How Do Dentists Choose and Transfer the Right Shade?
Here's the actual sequence a well-run implant practice follows, from the day you walk in for shade selection to the day your final crown leaves the lab.
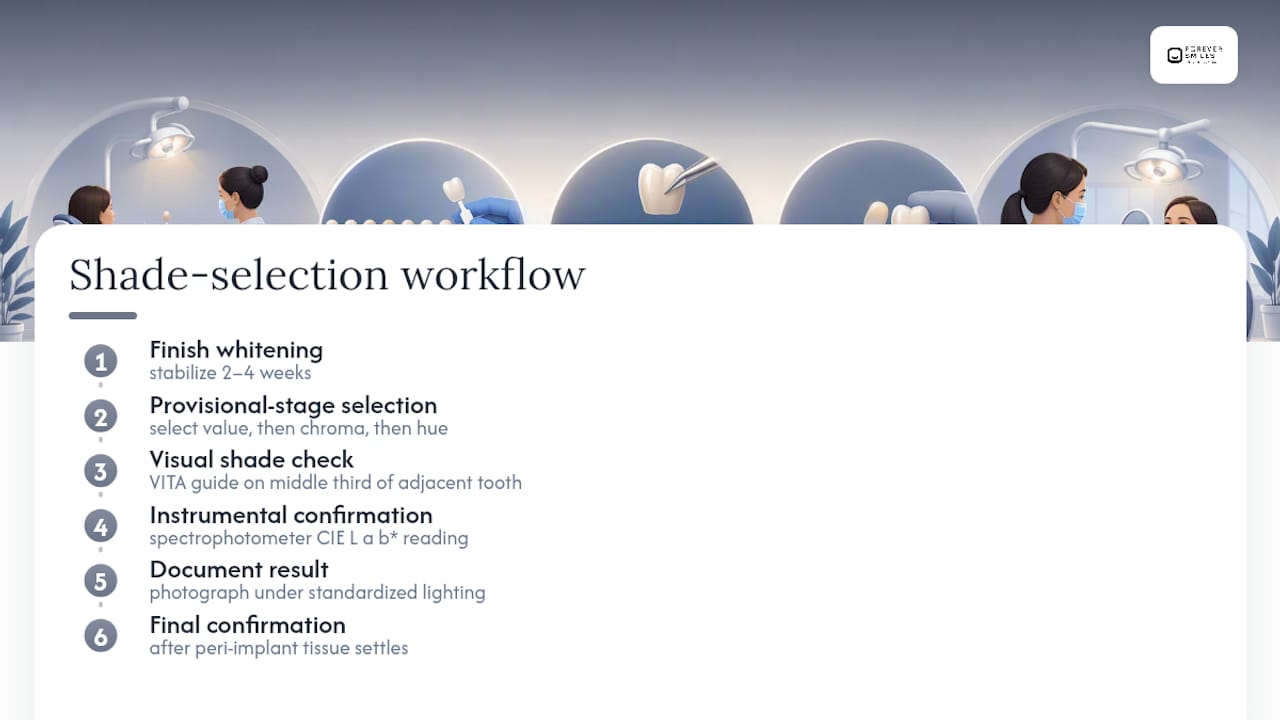
- Stabilize whitening first. If you're planning to whiten your teeth, do it before shade selection starts, not after. Tooth color continues shifting for weeks post-whitening.
- Photograph with a gray card. A calibrated photo under standardized lighting, with a neutral gray or 18% gray card in frame, gives the lab a color reference point that a phone photo alone can't provide.
- Visual check, value first. The clinician holds VITA tabs against the middle third of adjacent teeth, checking value before chroma or hue.
- Limit each look to 4 to 5 seconds. Staring longer causes eye fatigue and color drift; looking at a neutral gray card between passes resets your perception, based on research on observer fatigue in shade matching.
- Take an instrumental reading. A spectrophotometer like VITA Easyshade produces an objective CIE Lab* value that removes the guesswork inherent in eyeballing color.
- Fabricate custom shade tabs or a provisional, especially for difficult matches where standard tabs don't quite fit.
- Try in the provisional and photograph it under the same standardized conditions as the original shade photo.
- Send the full package to the lab, not just a shade letter and number.
Appointment checklist: consistent lighting (5500 to 6500K color temperature), neutral clothing to avoid color cast, lips retracted, tooth surface hydrated, no lipstick, a shade tab visible in every photo, and cross-polarized photography if your clinic has it. Our guide on the digital implant workflow covers how this documentation gets shared electronically with the lab team.
What the lab should receive: RAW photos with the gray card visible, Lab* or spectrophotometer readouts, a written description of incisal translucency and surface texture, and the chosen abutment material with its own shade noted separately.
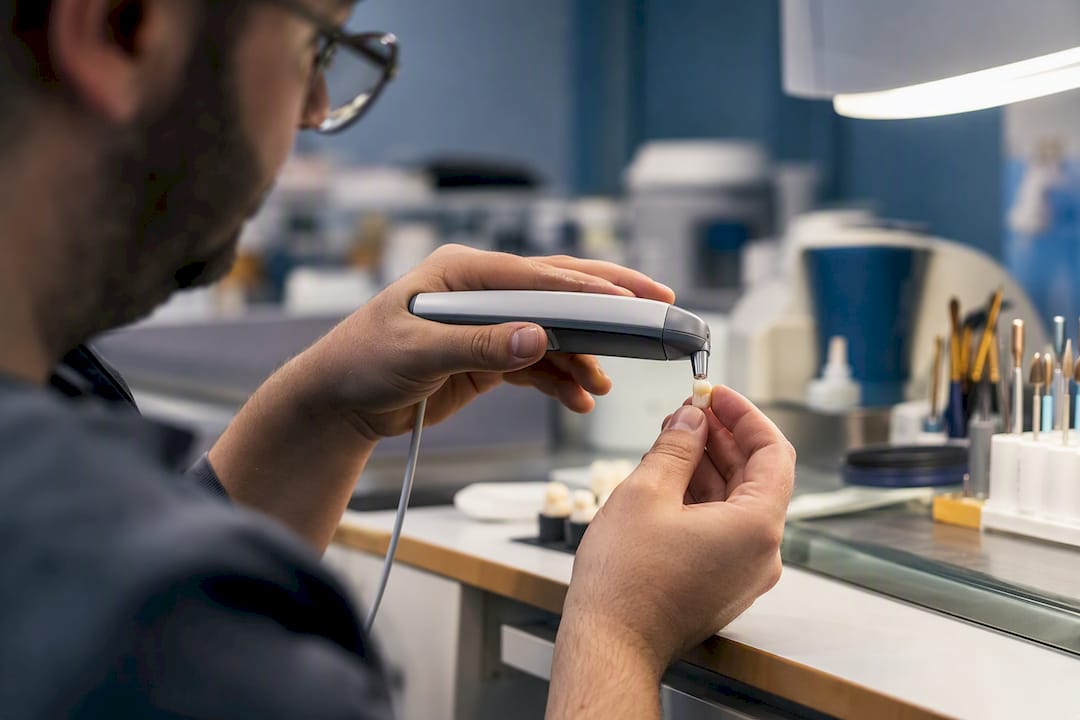
Pro Tip: Ask your clinic if they use custom shade tabs made from the actual restorative material for your case. A study on custom composite shade guides found this elimination-style approach meaningfully improves accuracy on tricky, in-between shades that don't match any stock tab perfectly.
Which Tools and Materials Actually Affect the Final Color?
The instruments in the room matter, but so does the crown material itself. Clinical courses generally split shade selection into visual and instrumental categories and recommend using both, since each method covers the other's blind spots.
- VITA Classic or VITA 3D-Master shade guides for the visual baseline.
- VITA Easyshade or a comparable spectrophotometer for an objective Lab* reading.
- Cross-polarized cameras that strip out glare and surface reflection, giving a truer color image.
- Neutral gray cards to calibrate white balance in every photo.
Material choice changes what's achievable. Monolithic zirconia is strong and opaque, which hides abutment color well but can look flat without added characterization. Layered lithium disilicate offers more lifelike translucency but shows more of what's underneath it, abutment included. Porcelain-fused-to-metal sits somewhere in between, with a metal substructure that has to be masked carefully. Any device reporting CIE Lab* values needs a clinician who knows how to translate those numbers into instructions the ceramist can actually use.
What Mistakes Lead to a Mismatched Crown?
Most shade mismatches trace back to a handful of repeatable errors.
- Checking shade under fluorescent light only. Fix: verify under natural daylight or a 5500 to 6500K color-corrected light too.
- Matching a dehydrated tooth surface. Fix: rehydrate and wait about 10 minutes before final selection, since dry enamel reads lighter and more opaque than it actually is.
- Comparing against the incisal edge instead of the middle third. Fix: reposition the shade tab against the middle third of the adjacent tooth.
- Ignoring abutment color entirely. Fix: confirm abutment material and shade as a separate step, not an afterthought.
- Skipping the provisional try-in. Fix: insist on seeing and photographing the provisional before the final crown is milled or layered.
The single best safeguard against all five: never rely on visual matching alone. Pairing it with an instrumental read reduces the subjectivity that causes most refabrications.
When Should Shade Selection Happen in the Implant Timeline?
Timing affects the outcome as much as the technique does.
- Finish whitening first, then wait 2 to 4 weeks for color to stabilize before anyone picks a shade.
- For a single anterior implant, shade gets selected at the provisional stage, once you've been wearing a temporary crown that lets the clinician preview color against settled tissue.
- Final shade confirmation often waits until peri-implant soft tissue contour has stabilized, which can take several weeks after healing for front-tooth cases.
- For full-arch cases, shade decisions get coordinated across the entire prosthesis design, not tooth by tooth. Our guide to full-mouth reconstruction covers how that planning works across multiple restorations at once.
Timing also drives abutment and material choices. A stable, mature gum line gives the lab more room to use translucent materials; a still-healing site often calls for more opaque, forgiving options.
Does Abutment Material Really Change the Final Tooth Color?
Yes, and the effect is well documented. A clinical spectrophotometric trial found that abutment and coping material combinations measurably change both crown color and peri-implant soft-tissue color, with all-ceramic combinations tending to produce the smallest color shifts in the surrounding gum tissue, according to research on implant-supported restoration esthetics. Gold-hue abutments paired with zirconia copings performed particularly well for crown color matching in that same study.
- Gray titanium abutments can cast a grayish tone through thin mucosa, which raises the measured ΔE and increases the odds of a visible mismatch.
- Zirconia or gold-anodized abutments mask the underlying metal hue and tend to improve the perceived match, especially in patients with thinner gum tissue.
- Thicker, more opaque ceramic hides the abutment better but sacrifices some of the lifelike translucency that makes a crown look real.
Remember the ΔE 3.7 threshold from earlier: material and abutment choice are two of the biggest levers a clinician has for staying under that number rather than drifting past it.
Translucency is a trade-off, not a free win. A thin, highly translucent crown looks more natural in isolation but is more likely to show whatever color sits underneath it, abutment included.
What Should You Ask at Your Shade Appointment?
Walk in prepared with a short list of questions, and you'll get a much clearer sense of how seriously your clinic treats this part of the process.
- Will you document my color with RAW photos and a gray card, not just a phone snapshot?
- Will a spectrophotometer reading be taken and sent to the lab along with the visual selection?
- Which abutment material are you recommending for my case, and why that one?
- Can I see and approve a provisional before the final crown is fabricated?
- How will you handle my case if the try-in color isn't quite right?
- What happens if my final shade doesn't match once the crown is in place?
At try-in, expect minor glaze or stain adjustments to be normal and routine, not a red flag. A full remake is reserved for a real mismatch, not a slight preference tweak. Keep in mind that shade harmony depends on multiple factors working together. Sometimes achieving a perfect optical match calls for lab characterization work rather than swapping the entire base shade.
Why Standardized Shade Protocols Matter More Than People Assume
Most patients assume shade matching comes down to a dentist eyeballing a tab against their teeth for a few seconds. The gap between that assumption and the actual process is where remakes happen. Standardized lighting, digital documentation, and instrumental readings sent directly to an in-house lab close that gap far more reliably than judgment alone.
Specialist teams that keep the lab under the same roof shorten the feedback loop dramatically. A ceramist who can walk over and look at the actual tissue, rather than interpret a shade letter over email, makes fewer wrong assumptions. That difference shows up in remake rates and, more importantly, in how natural the final result looks in your own mirror.
Get a Precision Shade Match for Your Implant Case
Shade-sensitive anterior cases need more than a quick tab comparison against your front teeth. Forever Smiles Implant Center runs digital photography with gray-card calibration, spectrophotometric readings, and an in-house dental lab that eliminates the guesswork of shipping shade instructions to an outside facility. That last part is what most general practices can't offer: your ceramist and your surgical team work from the same building, on the same day, which means color decisions get confirmed in person rather than lost in an email chain.
Complex anterior and full-arch esthetic cases benefit the most from this kind of tight coordination, especially when zygomatic implants or custom abutment materials are involved. If you're weighing your options, start with our dental implants FAQ page or explore full-mouth implant solutions in Jacksonville to schedule a consultation and shade evaluation with our team.
Frequently Asked Questions
What is tooth shade selection for implants? It's the clinical process of matching an implant crown's color to your surrounding natural teeth, combining a visual shade guide check with an instrumental spectrophotometer reading, then documenting both for the dental lab.
How do dentists choose the best tooth shade for an implant crown? They select value first, then chroma, then hue, using a VITA shade guide against the middle third of an adjacent tooth, then confirm with a spectrophotometer reading and photograph the result under standardized lighting.
Why does abutment color matter for implant shade matching? The abutment sits directly under the crown, and materials like gray titanium can create a visible grayish cast through thinner gum tissue, while zirconia or gold-hue abutments tend to mask that effect better.
What is a spectrophotometer used for in dental shade selection? A spectrophotometer, such as VITA Easyshade, provides an objective color reading in CIE Lab* values, removing subjectivity from purely visual shade matching and giving the lab precise numbers to work from.
When during implant treatment should shade be selected? Whitening should be completed and stabilized for 2 to 4 weeks first, and shade selection typically happens at the provisional stage, with final confirmation once peri-implant tissue has settled.
This article is general information, not a substitute for advice from a qualified doctor. Consult a qualified healthcare professional about your own circumstances before acting on anything here.
Sources
- Total Color Replication Process for Fixed Prosthodontics (American College of Prosthodontists position/paper)
- Shade selection in esthetic dentistry: a review (PMC)
- Dentalcare